Homemade Pet Food Safety: 7 Critical Steps to Avoid Contamination in Your 2026 Recipes (INSIDER KNOWLEDGE)
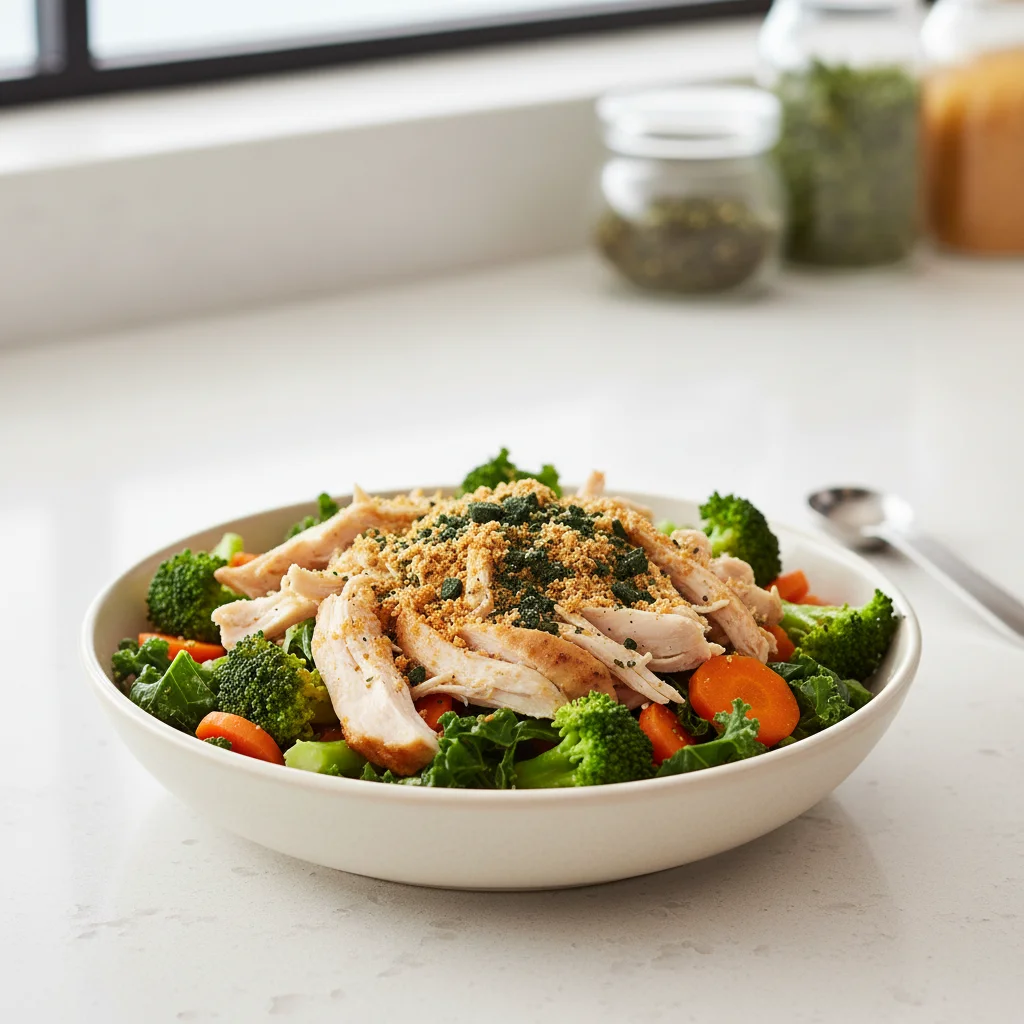
In recent years, the trend of feeding pets homemade meals has surged, driven by a desire for greater control over ingredients and a belief in providing more natural, wholesome nutrition. While the intentions are noble, the journey into homemade pet food safety is fraught with potential pitfalls if not approached with meticulous care. Unlike commercially prepared pet foods, which are subject to stringent regulations and quality control measures, homemade diets place the entire burden of safety on the pet owner. This is not to deter you from embarking on this rewarding path, but rather to equip you with the knowledge and practices necessary to ensure that your culinary creations are not only nutritious but also entirely safe for your beloved companions.
The risks associated with improperly prepared or stored homemade pet food are significant and can range from mild digestive upset to severe, life-threatening bacterial infections. Contamination can occur at various stages: from ingredient sourcing and preparation to cooking and storage. Understanding these risks and implementing robust preventative measures is paramount. This comprehensive guide will delve into 7 critical steps, offering insider knowledge to help you navigate the complexities of homemade pet food safety, ensuring your 2026 recipes are nothing short of exemplary.
Our pets are family, and their health and well-being are a top priority. By adhering to these guidelines, you can confidently provide them with delicious, homemade meals that contribute positively to their longevity and vitality, free from the shadow of foodborne illness. Let’s embark on this journey to master homemade pet food safety together.
Step 1: Source High-Quality, Human-Grade Ingredients
The foundation of any safe and nutritious homemade pet food diet begins with the ingredients themselves. This is arguably the most critical step in ensuring homemade pet food safety. The quality of your ingredients directly impacts the nutritional value and, more importantly, the safety of the final product. Using ingredients fit for human consumption significantly reduces the risk of pathogens and harmful contaminants.
Understanding Human-Grade vs. Feed-Grade
It’s crucial to understand the distinction between ‘human-grade’ and ‘feed-grade’ ingredients. Human-grade means the ingredient is edible for humans and meets the same federal and state standards for processing, packaging, and holding as human food. Feed-grade ingredients, conversely, do not meet these standards and may contain lower quality components, by-products, or even condemned animal parts, which can harbor bacteria or other harmful substances.
Where to Source Your Ingredients
- Local Butchers and Farmers’ Markets: These are excellent sources for fresh meats, poultry, and organs. You can often speak directly with the producers about their animal husbandry practices and ensure the meat is fresh and handled properly. Always ask for cuts that are human-grade.
- Reputable Grocery Stores: Stick to the same quality of produce and meats you would buy for your own family. Avoid discounted or nearly expired items, as these can pose a higher risk of bacterial growth.
- Organic and Free-Range Options: While not always necessary, opting for organic vegetables and free-range meats can further reduce exposure to pesticides, hormones, and antibiotics, contributing to overall homemade pet food safety.
- Specialty Pet Food Ingredient Suppliers: Some suppliers specialize in human-grade ingredients specifically for homemade pet food. Research these thoroughly to ensure they maintain high standards of quality and safety.
What to Look For
- Freshness: Always check expiration dates and look for vibrant colors and firm textures in produce. Meats should have a natural color and no off-putting odors.
- Proper Handling: Observe how ingredients are stored and handled at the point of sale. Are meats refrigerated correctly? Are produce areas clean?
- Variety: A varied diet is key to balanced nutrition. Don’t rely on just one type of protein or vegetable. Rotate your ingredients to provide a broad spectrum of nutrients.
By prioritizing human-grade, fresh ingredients from reliable sources, you lay a strong foundation for homemade pet food safety, significantly mitigating the risk of introducing harmful elements into your pet’s diet from the outset.
Step 2: Meticulous Hygiene Practices in the Kitchen
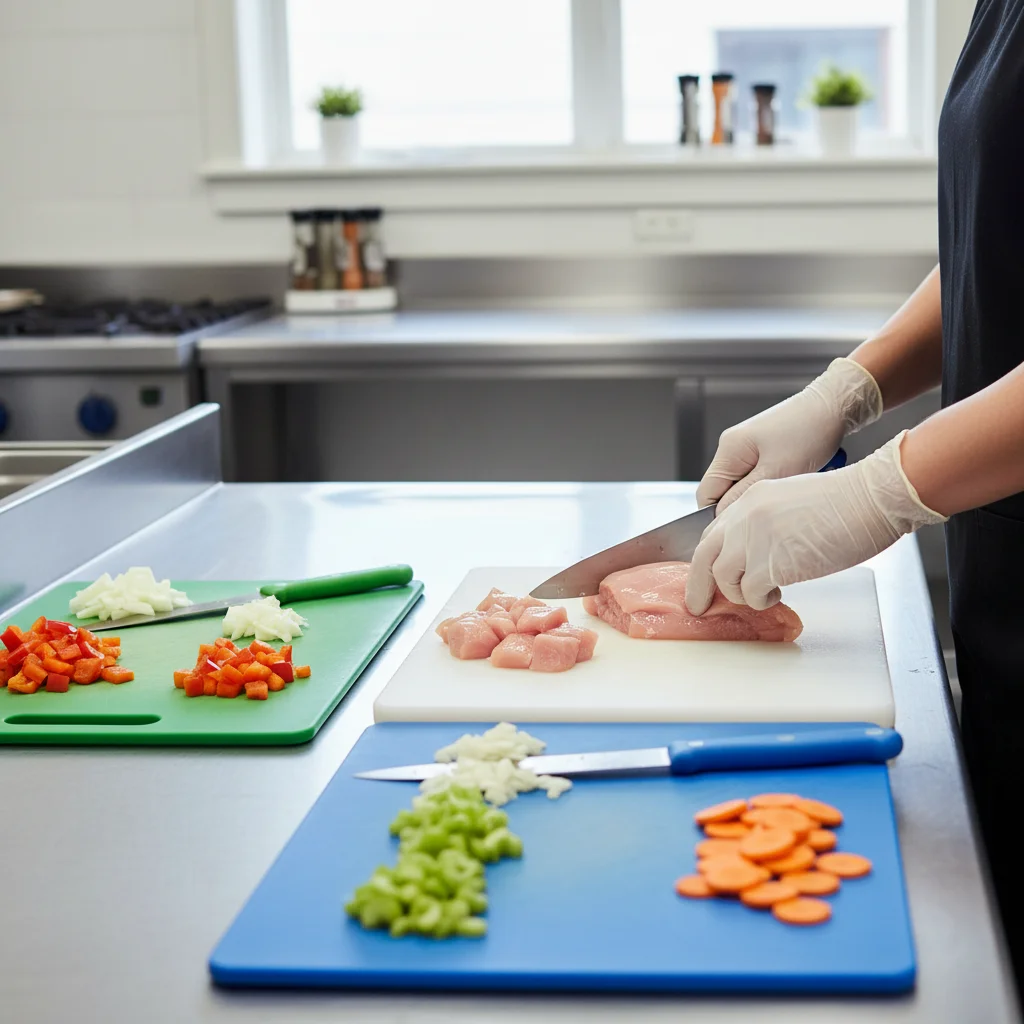
Once you have your high-quality ingredients, the next crucial step in maintaining homemade pet food safety is implementing rigorous hygiene practices in your kitchen. Cross-contamination is a silent enemy, capable of transferring harmful bacteria from raw ingredients to cooked food or surfaces, even after cooking. A clean kitchen environment and proper handling techniques are non-negotiable.
Before You Begin
- Wash Your Hands: This seems obvious, but it’s the first line of defense. Wash your hands thoroughly with soap and warm water for at least 20 seconds before, during, and after handling pet food ingredients, especially raw meat.
- Sanitize Surfaces and Utensils: Before you even bring out the ingredients, ensure all countertops, cutting boards, knives, bowls, and other utensils are thoroughly cleaned and sanitized. Use hot, soapy water, followed by a sanitizing solution (e.g., a diluted bleach solution or a commercial kitchen sanitizer).
During Preparation
- Separate Raw and Cooked: This is paramount. Use separate cutting boards, knives, and bowls for raw meats and vegetables. Ideally, have color-coded boards (e.g., red for meat, green for vegetables) to avoid confusion.
- Prevent Cross-Contamination: Never place cooked food back on a plate or surface that previously held raw meat without washing it thoroughly.
- Clean as You Go: Wipe up spills immediately. Don’t let raw meat juices sit on your countertops.
- Avoid Washing Raw Meat/Poultry: Contrary to popular belief, washing raw meat or poultry under the tap can actually spread bacteria around your kitchen through splashing water. Cooking to the correct internal temperature is what kills pathogens.
After Preparation
- Thorough Cleaning: Immediately after preparing pet food, wash all used utensils, cutting boards, and surfaces with hot, soapy water. Consider running items through a dishwasher on a hot cycle for extra sanitization.
- Hand Washing (Again!): Always wash your hands again thoroughly after you’ve finished preparing the food.
By adopting these meticulous hygiene practices, you create a barrier against bacterial spread, significantly enhancing homemade pet food safety and protecting both your pet and your household from potential foodborne illnesses.
Step 3: Proper Cooking and Temperature Control
For cooked homemade pet food, achieving the correct internal temperature is absolutely vital for homemade pet food safety. Cooking kills harmful bacteria like Salmonella, E. coli, and Listeria that can be present in raw meats, poultry, and eggs. Merely heating food is not enough; it must reach and hold a specific temperature for a sufficient duration.
Understanding Safe Internal Temperatures
The U.S. Department of Agriculture (USDA) provides guidelines for safe cooking temperatures for human food, which are equally applicable to pet food:
- Poultry (chicken, turkey): 165°F (74°C)
- Ground Meat (beef, pork, lamb): 160°F (71°C)
- Whole Cuts of Meat (beef, pork, lamb): 145°F (63°C) with a 3-minute rest time
- Fish: 145°F (63°C)
- Eggs: Cook until yolks and whites are firm.
It’s important to note that these are minimum temperatures. Cooking slightly above them can offer an extra margin of safety, especially when dealing with larger cuts or dense mixtures.
The Importance of a Food Thermometer
Guessing if food is cooked through is a dangerous game. A reliable meat thermometer is an indispensable tool for homemade pet food safety. Insert the thermometer into the thickest part of the meat, avoiding bone, to get an accurate reading. Calibrate your thermometer regularly to ensure its accuracy.
Cooking Methods and Considerations
- Boiling/Simmering: Ensures even cooking, especially for softer meats and vegetables.
- Baking/Roasting: Can achieve good internal temperatures, but ensure the center is fully cooked, not just the exterior.
- Steaming: A gentle method that retains nutrients but still achieves safe temperatures.
- Raw Diets: If you choose to feed a raw diet, the risks of bacterial contamination are inherently higher. This requires even more stringent sourcing, handling, and storage practices (as discussed in other steps). Some veterinarians advise against raw feeding due to these risks, especially for pets with compromised immune systems. If you opt for raw, consider ‘lightly cooked’ options or methods like blanching to reduce surface bacteria without fully cooking.
Cooling Cooked Food
Once cooked, food should be cooled rapidly before storage. Divide large portions into smaller, shallow containers to facilitate quicker cooling. Do not leave cooked food at room temperature for more than two hours, as this enters the ‘danger zone’ where bacteria multiply rapidly. Rapid cooling is a key component of homemade pet food safety.
By meticulously monitoring cooking temperatures and employing safe cooling techniques, you effectively eliminate the majority of foodborne pathogens, making your homemade pet food safe and palatable for your furry friend.
Step 4: Safe Storage and Portioning
Even after meticulous preparation and cooking, homemade pet food safety can be compromised if not stored correctly. Proper storage is crucial to prevent bacterial growth and maintain freshness. This step also involves thoughtful portioning to ensure convenience and minimize waste.
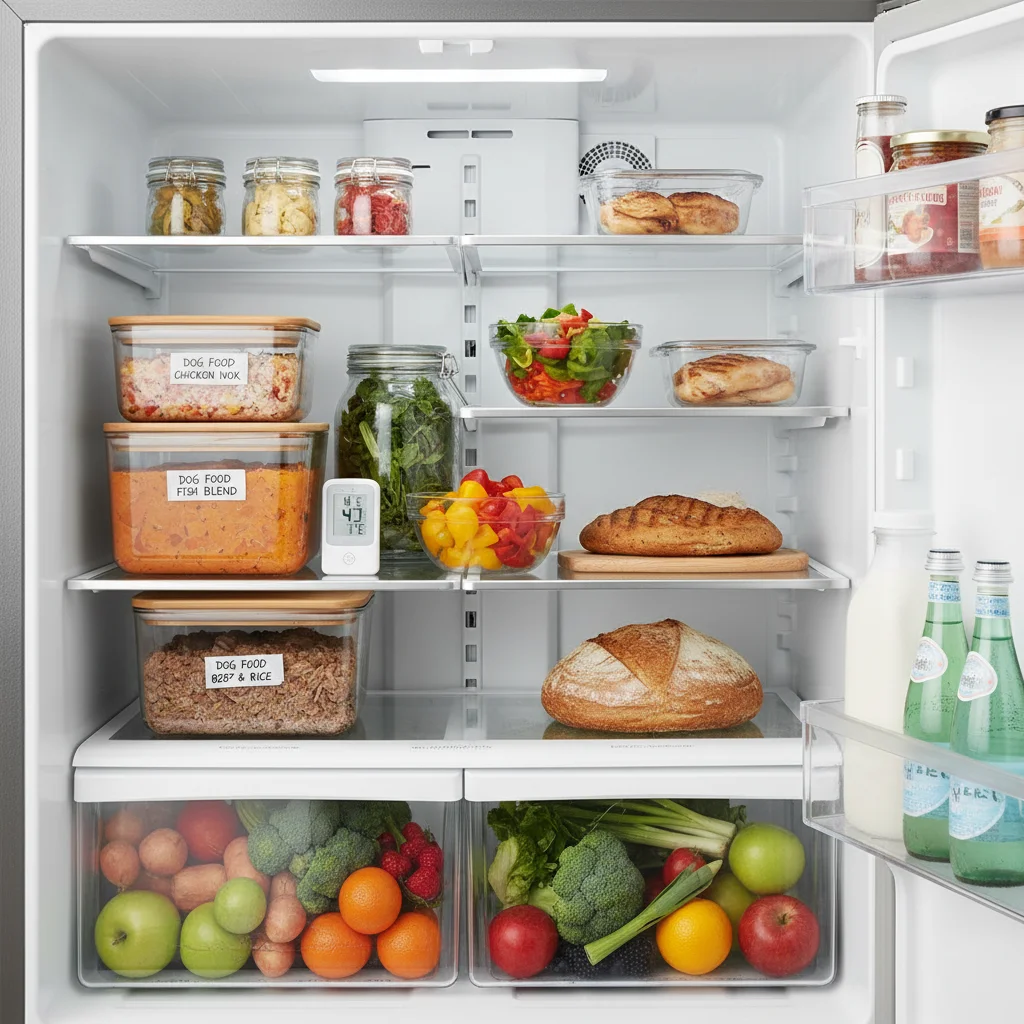
Refrigeration Guidelines
- Prompt Refrigeration: As mentioned, cooked food should be cooled and refrigerated within two hours of cooking. The refrigerator temperature should be maintained at or below 40°F (4°C).
- Airtight Containers: Store homemade pet food in clean, airtight containers. This prevents exposure to air, which can cause spoilage, and also prevents cross-contamination with other foods in your refrigerator. Glass containers are often preferred as they don’t absorb odors or leach chemicals.
- Shelf Life: Cooked homemade pet food typically lasts 3-4 days in the refrigerator. Label containers with the date of preparation to keep track. If you’re unsure, it’s always safer to discard.
Freezing for Longer Storage
- Portion Control Before Freezing: This is where portioning becomes vital. Divide the cooked and cooled pet food into individual meal portions before freezing. This allows you to thaw only what you need, reducing waste and maintaining freshness.
- Freezer-Safe Containers/Bags: Use freezer-safe containers or heavy-duty freezer bags to prevent freezer burn. Remove as much air as possible from bags.
- Labeling: Always label containers with the contents and the date of freezing. Homemade pet food can typically be stored in the freezer for up to 2-3 months without significant loss of quality.
- Freezer Temperature: Ensure your freezer maintains a temperature of 0°F (-18°C) or colder.
Thawing Frozen Food Safely
- Refrigerator Thawing: The safest way to thaw frozen pet food is in the refrigerator. This can take 12-24 hours, so plan ahead.
- Cold Water Thawing: For quicker thawing, place the sealed food package in a bowl of cold water, changing the water every 30 minutes. Cooked food thawed this way should be used immediately.
- Microwave Thawing: While possible, microwave thawing can lead to uneven heating, which can promote bacterial growth in colder spots. If using this method, cook or serve immediately after thawing.
- Never Thaw at Room Temperature: This allows bacteria to multiply rapidly in the ‘danger zone’.
By diligently following these storage and portioning guidelines, you extend the shelf life of your homemade pet food while critically maintaining homemade pet food safety, ensuring each meal served is as fresh and safe as the day it was prepared.
Step 5: Balanced Nutrition and Veterinary Consultation
While the focus of this article is primarily on homemade pet food safety from a contamination perspective, it’s impossible to discuss homemade diets without addressing nutritional completeness. An unbalanced diet, even if free from pathogens, can lead to serious health issues over time. This step emphasizes the importance of providing a nutritionally complete meal and the indispensable role of your veterinarian or a veterinary nutritionist.
The Complexity of Pet Nutrition
Pets have specific dietary requirements that vary by species, age, breed, activity level, and health status. Simply mixing meat, vegetables, and grains does not guarantee a balanced meal. Deficiencies or excesses of certain nutrients can have long-term detrimental effects. For instance:
- Calcium and Phosphorus Imbalance: Critical for bone health, an incorrect ratio can lead to skeletal problems, especially in growing animals.
- Vitamin and Mineral Deficiencies: Can cause a range of issues from coat problems to organ failure.
- Protein and Fat Levels: Need to be tailored to your pet’s needs to prevent obesity or muscle wastage.
The Role of a Veterinary Nutritionist
Formulating a nutritionally complete and balanced homemade diet is complex and requires specialized knowledge. This is where a board-certified veterinary nutritionist becomes an invaluable resource. They can:
- Assess Your Pet’s Needs: Based on their medical history, age, activity, and any existing conditions.
- Formulate a Specific Recipe: Create a custom recipe that meets all your pet’s nutritional requirements, including appropriate ratios of macronutrients, vitamins, and minerals.
- Recommend Supplements: Advise on necessary supplements (e.g., calcium, specific vitamins, omega-3 fatty acids) to fill any nutritional gaps that whole foods alone cannot provide.
- Review Your Current Diet: If you’re already feeding a homemade diet, they can analyze it for deficiencies or excesses.
Why Your Regular Vet Might Not Be Enough
While your primary care veterinarian is essential for your pet’s overall health, most general practitioners do not have the extensive training in nutrition required to formulate complex homemade diets. They can certainly offer general advice and monitor your pet’s health, but for detailed recipe formulation, a specialist is usually required.
Ongoing Monitoring
Even with a perfectly formulated diet, regular veterinary check-ups are crucial. Blood tests and physical examinations can help monitor your pet’s nutritional status and catch any potential issues early. Adjustments to the diet may be necessary as your pet ages or their health status changes.
By combining rigorous homemade pet food safety practices with expert nutritional guidance, you ensure that your pet receives a diet that is not only safe from contamination but also optimally supports their long-term health and vitality.
Step 6: Understanding Raw Food Risks and Mitigation
The popularity of raw food diets for pets has grown, with proponents citing benefits such as improved coat health, dental hygiene, and higher energy levels. However, it’s imperative to acknowledge that raw feeding carries inherent and significant risks to homemade pet food safety, primarily due to the potential presence of pathogenic bacteria. This step focuses on understanding these risks and, if you choose to feed raw, how to mitigate them as much as possible.
The Inherent Risks of Raw Meat
- Bacterial Contamination: Raw meat, poultry, and eggs frequently contain bacteria such as Salmonella, E. coli O157:H7, Listeria monocytogenes, and Clostridium perfringens. These bacteria can cause severe gastrointestinal illness in pets and can also be shed in their feces, posing a risk to humans, especially children, the elderly, and immunocompromised individuals.
- Parasites: Raw meat can also harbor parasites, though freezing can often kill some types.
- Nutritional Imbalances: As discussed in Step 5, achieving a balanced raw diet without professional guidance is extremely difficult and can lead to serious health problems.
- Bone Hazards: Raw bones, while often advocated for dental health, can splinter and cause choking, internal punctures, or obstructions.
Mitigation Strategies for Raw Feeders
If you decide to feed a raw diet, these mitigation strategies are absolutely essential to minimize the risks to homemade pet food safety:
- Source from Reputable Suppliers: Purchase raw ingredients specifically marketed and tested for raw pet diets, or human-grade meat from trusted sources. Some specialized raw pet food suppliers implement high-pressure pasteurization (HPP) which can reduce bacterial load without cooking.
- Strict Hygiene: Adhere to all hygiene practices outlined in Step 2 with even greater vigilance. Use dedicated utensils, cutting boards, and bowls for raw food preparation that are separate from those used for human food. Sanitize everything thoroughly immediately after use.
- Proper Storage: Store raw pet food separately from human food in the refrigerator, ideally on the bottom shelf to prevent drips onto other items. Freeze raw food in individual portions immediately.
- Safe Thawing: Thaw raw food in the refrigerator, never at room temperature. Dispose of any uneaten raw food promptly.
- Feed in Designated Areas: Feed your pet raw food in an easily cleanable area, away from human eating spaces. Clean and disinfect bowls and feeding areas immediately after each meal.
- Monitor Your Pet: Watch for any signs of illness in your pet (vomiting, diarrhea, lethargy) and consult your vet immediately.
- Personal Hygiene: Wash your hands thoroughly with soap and water after handling raw food or after touching your pet’s mouth or feces.
- Consider Light Cooking: If you’re concerned about raw risks but want some benefits, light cooking (e.g., blanching or very quick searing) can reduce surface bacteria while retaining some raw food characteristics. However, this still requires careful nutritional balancing.
- Veterinary Consultation: Work closely with a board-certified veterinary nutritionist experienced in raw diets to ensure the diet is nutritionally complete and to discuss specific risk mitigation strategies.
Feeding raw is a personal choice, but it’s one that demands a high level of commitment to homemade pet food safety and an understanding of the potential public health implications. Always prioritize prevention and consult with professionals.
Step 7: Avoid Hazardous Ingredients and Toxic Foods
Beyond bacterial contamination, another crucial aspect of homemade pet food safety is ensuring that the ingredients you use are not inherently toxic or harmful to pets. Many common human foods are highly dangerous for animals and must be strictly avoided. This step provides a comprehensive overview of foods to steer clear of and other hazardous items.
Common Toxic Foods for Pets
- Chocolate: Contains theobromine, which is toxic to dogs and cats. Dark chocolate and baking chocolate are the most dangerous.
- Xylitol (Birch Sugar): A sugar substitute found in many sugar-free products (gum, candy, peanut butter, toothpaste). Extremely toxic to dogs, causing a rapid release of insulin and potentially liver failure.
- Onions, Garlic, Leeks, Chives: All members of the Allium family. They contain compounds that can cause red blood cell damage (hemolytic anemia) in dogs and cats. Raw, cooked, or powdered forms are all dangerous.
- Grapes and Raisins: Can cause acute kidney failure in dogs, even in small amounts. The exact toxic agent is unknown, but the risk is significant.
- Avocado: Contains persin, which can be toxic to some animals (especially birds and horses). While dogs and cats are generally more resistant, large amounts can cause gastrointestinal upset.
- Macadamia Nuts: Can cause weakness, vomiting, tremors, and hyperthermia in dogs.
- Alcohol: Even small amounts can be toxic, causing vomiting, diarrhea, central nervous system depression, tremors, and potentially death.
- Caffeine: Found in coffee, tea, energy drinks, and some medications. Can cause restlessness, rapid breathing, heart palpitations, and muscle tremors.
- Yeast Dough: Can rise in a pet’s stomach, causing painful bloating and potentially a life-threatening condition called bloat (gastric dilatation-volvulus or GDV). The yeast also produces alcohol.
- High-Fat Foods: Can lead to pancreatitis, a painful and serious inflammation of the pancreas, especially in dogs.
- Cooked Bones: Become brittle and can splinter, causing choking, internal punctures, or obstructions. Only raw, appropriate bones should be considered (with caution, as discussed in Step 6).
Other Hazardous Ingredients and Considerations
- Excessive Salt: Can lead to sodium ion poisoning, causing vomiting, diarrhea, tremors, and seizures.
- Dairy Products: Many pets are lactose intolerant and consuming dairy can lead to digestive upset (diarrhea, gas).
- Raw Eggs: While some raw feeders use them, raw egg whites contain avidin, an enzyme that can interfere with biotin absorption, leading to skin and coat problems over time. Raw eggs also carry a risk of Salmonella.
- Pits and Seeds: Apple seeds contain cyanide. Cherry, peach, and apricot pits contain cyanide and can also be choking hazards or cause intestinal obstruction.
- Nutmeg: Can cause neurological symptoms, including tremors and seizures, if ingested in large quantities.
- Rhubarb: The leaves contain oxalates, which can cause kidney problems.
Preventative Measures
- Educate Yourself: Continuously learn about what foods are safe and unsafe for your specific pet species.
- Keep Out of Reach: Store all toxic foods and ingredients securely out of your pet’s reach.
- Clear Communication: Inform all family members and guests about foods that are dangerous for your pets.
- Emergency Plan: Know your nearest emergency veterinary clinic’s contact information and procedures in case of accidental ingestion.
By being vigilant about what goes into your homemade pet food and what is accessible to your pets, you significantly enhance homemade pet food safety, preventing accidental poisonings and ensuring their continued health.
Conclusion: Mastering Homemade Pet Food Safety for a Healthier Pet
Embarking on the journey of preparing homemade meals for your beloved pets is a testament to your dedication to their well-being. It offers the unique advantage of complete ingredient control, allowing you to tailor their diet to specific health needs and preferences. However, as we’ve thoroughly explored, this responsibility comes with a critical mandate: mastering homemade pet food safety.
The 7 critical steps outlined in this guide are not merely suggestions; they are the pillars upon which a safe, nutritious, and beneficial homemade diet stands. From the moment you select your ingredients to the final act of serving a meal, every stage demands attention to detail, adherence to hygienic practices, and an unwavering commitment to your pet’s health. The risks of contamination, nutritional imbalance, and exposure to toxic substances are real, but with the insider knowledge provided, you are now equipped to navigate these challenges confidently.
Let’s briefly recap the essential takeaways for ensuring your 2026 recipes are safe and exemplary:
- Source High-Quality, Human-Grade Ingredients: The fresher and cleaner your starting materials, the safer your final product.
- Implement Meticulous Hygiene Practices: Prevent cross-contamination at all costs with thorough hand washing, surface sanitization, and separation of raw and cooked items.
- Ensure Proper Cooking and Temperature Control: Utilize a food thermometer to guarantee that all cooked ingredients reach safe internal temperatures, eliminating harmful pathogens.
- Practice Safe Storage and Portioning: Rapidly cool, correctly portion, and store food in airtight containers in the refrigerator or freezer, and always thaw safely.
- Prioritize Balanced Nutrition and Veterinary Consultation: Work with a board-certified veterinary nutritionist to formulate a complete and balanced diet, tailored to your pet’s specific needs.
- Understand Raw Food Risks and Mitigation: If choosing a raw diet, be acutely aware of bacterial risks and implement stringent hygiene and sourcing protocols to minimize danger.
- Avoid Hazardous Ingredients and Toxic Foods: Be vigilant about common human foods that are poisonous to pets and keep them strictly out of reach.
By integrating these practices into your routine, you are not just preparing food; you are actively safeguarding your pet’s health, extending their happy years, and enriching their lives. The satisfaction of providing a truly wholesome and safe meal to your furry companion is immeasurable. Continue to educate yourself, remain diligent, and never hesitate to consult with veterinary professionals. Your commitment to homemade pet food safety is the greatest gift you can give your pet.
Here’s to many years of healthy, happy, and safe homemade meals for your cherished pets!